Hello,
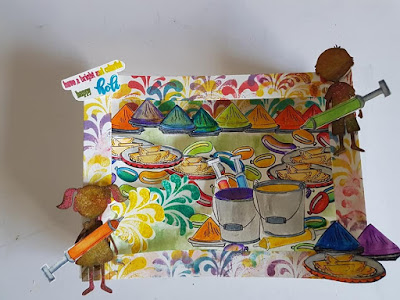
Today I have made a Scene Card for an Indian festival of colors : Holi .
Scene Cards are basically Layered cards which give a 3D perceptive.
In this we try and create a scene. Scene be of any occasion eg Wedding , birthday etc
Today I have done for the festival of colors HOLI
Like in this card I have placed the color powder plates in one row.
Then sweets and color water filled balloons in one row.
Then the color water filled bucket with pichkaris
A boy and a girls playing on either corners.

I have first stamped the images on a white cardstock using masking technique
Then colored them with Zig watercolor brushes
Then put shimmer pates to give a glittery look to everything.
Now fussy cut from the top side only.
Now take 8 by 6 inches cardstock 2 numbers : one for the base and one for the frame.
Take another 2 pieces of cardstock 6 by 2.5 inches . Score at every half inches and fold like a fan.
This we will adhere on the sides of the base cardstock.
Then adhere the layers one by one with red tacky tape or any other adhesive
Stamp the water splash stamp on the frame cardstock with distress ink and add Candy shimmer paste.
Now randomly color the boy and the girl with different distrss inks.
Place them on the corners.
Stick the pichkaris on them with foam tape.
Add the color powder plates and sweets plate in one corner.
For the sentiment I have used different color embossing powders to go well with the festival.
PLEASE CHECK OUT THE VIDEO FOR THE TUTORIAL OF THIS CARD
Few more photos


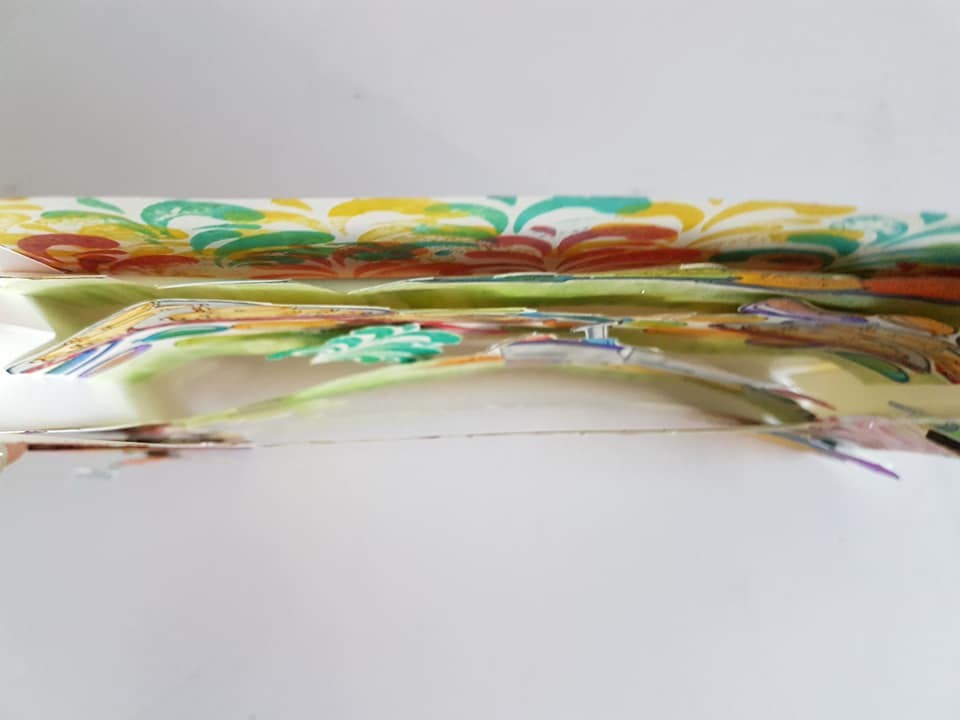
Doesn't it seem that the girl is throwing water splashes on the boy and
the things are kept at different levels ?

Supplies Used
White cardstock
Distress Inks
Black archival Ink
Versamark
Wow embossing powders
Craftyscrappers CELEBRATE HOLI stamp set
Craftyscrappers Shimmer paste
Zig color brush pens
Chipboard girl boy
Red tacky tape
That's all from my side today.
Hope you all like my card as much I did creating it.
Happy Crafting
Meeta
Entering in
sir stamp a lot march -rainbow 63 03/04
kat scrappines rainbows ** 01/04
scrapping 4 fun challenges 136 44 29/03
Today I have made a Scene Card for an Indian festival of colors : Holi .
Scene Cards are basically Layered cards which give a 3D perceptive.
In this we try and create a scene. Scene be of any occasion eg Wedding , birthday etc
Today I have done for the festival of colors HOLI
Like in this card I have placed the color powder plates in one row.
Then sweets and color water filled balloons in one row.
Then the color water filled bucket with pichkaris
A boy and a girls playing on either corners.

I have first stamped the images on a white cardstock using masking technique
Then colored them with Zig watercolor brushes
Then put shimmer pates to give a glittery look to everything.
Now fussy cut from the top side only.
Now take 8 by 6 inches cardstock 2 numbers : one for the base and one for the frame.
Take another 2 pieces of cardstock 6 by 2.5 inches . Score at every half inches and fold like a fan.
This we will adhere on the sides of the base cardstock.
Then adhere the layers one by one with red tacky tape or any other adhesive
Stamp the water splash stamp on the frame cardstock with distress ink and add Candy shimmer paste.
Now randomly color the boy and the girl with different distrss inks.
Place them on the corners.
Stick the pichkaris on them with foam tape.
Add the color powder plates and sweets plate in one corner.
For the sentiment I have used different color embossing powders to go well with the festival.
PLEASE CHECK OUT THE VIDEO FOR THE TUTORIAL OF THIS CARD
Few more photos



Doesn't it seem that the girl is throwing water splashes on the boy and
the things are kept at different levels ?

Supplies Used
White cardstock
Distress Inks
Black archival Ink
Versamark
Wow embossing powders
Craftyscrappers CELEBRATE HOLI stamp set
Craftyscrappers Shimmer paste
Zig color brush pens
Chipboard girl boy
Red tacky tape
That's all from my side today.
Hope you all like my card as much I did creating it.
Happy Crafting
Meeta
Entering in
sir stamp a lot march -rainbow 63 03/04
kat scrappines rainbows ** 01/04
scrapping 4 fun challenges 136 44 29/03


