Hello Friends
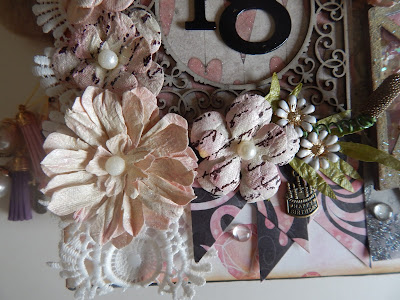
Here is a floral money wrap I made .
Used stencils , die cuts , handmade foamriam flowers, Inka Gold , Mudra sequins and Chipzeb
First I distressed the white cardstock with vintage distress oxide
Then with the help of the wire mess stencil I made the background
Added another stencil ...damask background with inka gold
Placed a lacey snowflakes die cut as the base to add the floral layout.
Then placed the leaves and flourishes.
Made Foamiran flowers using heartfelt creation Sunkissed fleur die
Colored them with archival inks ( as I did not have the pastels crayons :( but the effects are good)
Assembled them .
Finally added the Mudra Gold Sequins and Chipzeb.
Loved the bling on the money wrap after adding Mudra Gold Sequins ( it has the right mix of sizes to use on any project.)
Thank you for stopping by my blog
Happy Crafting
Hugs
Meeta
Supply Used
Wire mesh stencil
Damask Stencil
Lacey Snowflakes Die
Flourish Die
Heartfelt Creations Sun kissed Fleur Die
flat pearl
Leaf die
Vintage Distress Oxide
Archival Inks ...
Mudra Chipzeb and Gold Sequins
Thank you for stopping by my blog.
Happy Crafting
Meeta
Linking it to
mudra craft stamps 2018/05 challenge-21 29 31/05
ttcrd 2018/05 anything-goes-challenge-may-22 86 29/05
cute daisy may 2018/05/ anything-goes with die cuts 27 03/06
word art wednesday 2018/05/anything-goes-weeks-336-337 134 06/06
inspiration destination challenge /2018/05 151 76 05/06
cards galore challenges 2018/05 154 31/05


